Training Your Roller Kit
By Jon Lahman
Let me start by telling you that I am not going to pretend to be the greatest roller flyer in the world, There are many people that know much more about flying rollers than I do, but I doubt that many get more enjoyment from their birds than I do. My intention is to help those just getting started flying to get more satisfaction out of their birds. I started raising rollers in the early 70’s and have had birds most of the time since then. I have kept other breeds, but rollers have always been my favorite. These are the basic training methods that I use with my kits. If you are looking for info on competition flying I have included a list of resources at the end of this article that should help you. If you follow these basic guidelines, I think that you will enjoy your birds too. You can’t train a roller to roll, but with proper training you can get the most out of your birds. Without proper training and handling you can ruin even the best birds, they will become lazy, seldom in the roll, and generally not much fun to watch.
Acquiring Birds
To begin with you will need birds, either through your own breeding. or through a knowledgeable fancier. Preferably you should start with squeakers as they are much easier to train than older birds. If you start with older birds these training methods will work, but it will take more time, and breaking bad habits can be difficult. What I recommend is to purchase breeding stock from a loft known for good birds and then raise and train the youngsters that you have bred.
Training Starts When They Are Still In The Nest
When my babies are starting to move around in the nestbox I will put a little feed in the box for their parents. When I do this I whistle at my birds and they associate this with food. Before long the babies will peck at the feed, and soon realize that I am the food source. Soon they will squeak and beg for food whenever I am in the loft. My breeding pairs and young kit birds get fed twice a day.
Out of the nest
After the babies are eating pretty well on their own, I take them out of their nestbox and place them on the lower perches of the breeding loft. Here they will get to know the other youngsters and their parents can still feed them. Soon they will be going to the flying loft and I think that it is less stressful if they know other birds. I feed them twice a day and always whistle. Make sure that they are eating and drinking enough, or put them back with their parents for a few days. Also watch for scalping from the cock birds. I have a box near the floor for them to hide in and this seems to help.
To The Kitbox
Some fanciers remove youngsters to the flying loft as early as 18 days, I prefer to wait until around 25 days myself as I feel that the extra size and feathering will keep them more comfortable in the flying loft. At any rate move them before they are flying well as they will be hard to control if you don’t. Hopefully you will have a group of several youngsters around the same age, If some are a week or so older you can hold them back and train them with the rest. If the ages are much different you should probably train them separately.
The Kit Box
A kit box is simply a small loft for flying rollers. Its small size prevents birds from flying much inside it .It is usually built on legs and has doors that open wide for releasing birds. Most kit boxes can be shut to keep out most of the daylight, as this will help the birds to kit and perform better. I think that it is good to be able to let light in after the birds have flown for the day. I recommend that you have a separate section in the kit box for your young birds. Click here to view Jimmy Hill’s Kit box. Ideally the kit box should be placed out in the open where it is highly visible from the air. My yard is obscured by trees, and this creates problems training and viewing birds. I have been told that I should just cut down the trees, but I also enjoy my trees and gardens too much to do that. To add visibility to my loft I have a windsock on a flagpole flying above my house. It is bright yellow and red GO KC CHIEFS.
Trap Training
After a couple of days in the kit box it is time to start trap training. A trap will allow the birds into the loft, but not out. The simplest traps are just small windows that the bird can squeeze through. There is a landing board on the outside but not on the inside of the loft. The birds can’t get out because their flapping wings won’t fit. Your landing board can be hinged to fold up to form a door for the trap. I simply cage the birds on top of the loft so that they can see their surroundings. My training cage hangs over the loft so that they can get to the trap. I show each bird how the trap works and push them through it several times. When I do this I am whistling and food is available in the loft. My kit box is set up so that I can retrieve birds out of the loft and easily put them back into the training cage. As they trap in I let them eat just a little then back to the training cage they go. I get kind of an assembly line going with birds going to the training cage, through the trap, a little food, then back to the training cage, Five or ten minutes of this and every bird has trapped many times. The slower ones won’t get as much food and will trap faster the next time. Keep this up twice a day for a couple of days and your birds will trap readily.
Settling The Birds
At this point I remove the training cage. and carefully place the birds on top of the loft. They have not eaten recently and are quite hungry. I close the trap so that the birds have to spend some time outside. At this point the birds still can’t fly well and are easily caught if they try. They usually just lounge around on top of the loft. After a short time I open the trap and call them, they should trap right in. There is food waiting in the loft and again the slow ones won’t get their full share. Again they should be faster next time. I try to do this twice a day, but feed them lightly in the morning or they will want to loaf around. Also I would only put the birds out on fairly calm days for the first few weeks.
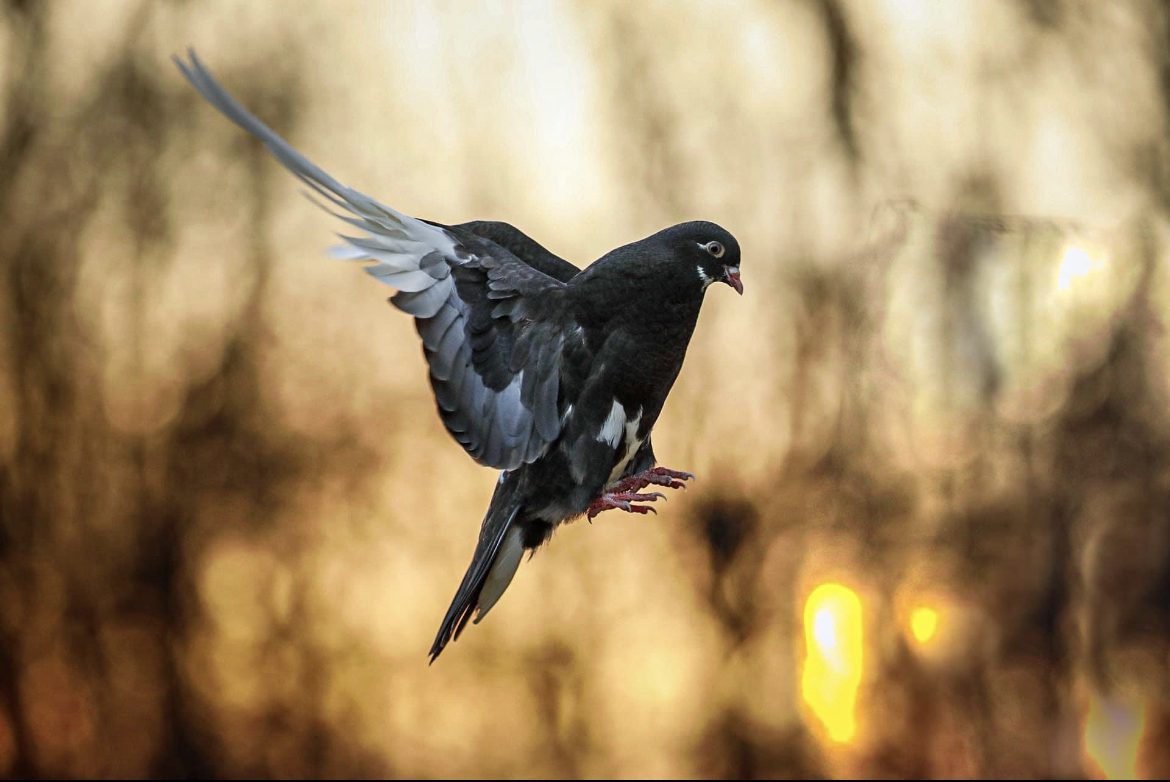
Releasing The Birds
After your birds are settled you can just open the door and clap your hands, and some of the older more adventurous birds will fly out on their own. For a few days I will still set the other birds on top of the loft. After a couple of days the ones that stay in the loft will be lightly tossed. Be careful at this point so as not to scare them too much. They will soon understand that clapping means time to fly.
Getting Them To Fly
At this point you may have a few birds that are fluttering around above the loft when you release them. The ones that are not flying can be lightly tossed into the air and they will usually fly for a short time. Do not fly any birds that are strong flyers with this young kit yet. After a short fly the birds should land back on the loft. Once you have a group of birds flying, insist that all of the youngsters fly a little after release them. Some birds will require tossing for several days to get the idea. My point is that when the door is opened and you clap, the birds know that they are going to fly like it or not. Don’t insist that they have to fly very long, and let them land when they want to. Just make sure that they all fly a little. At this point you will have birds all over the air, some hovering, some roaming a little and some that do almost nothing. Performing rollers love to fly and will soon do so without your encouragement.
Landing Area
When your birds have finished flying you should insist that they land on the loft. One problem with my yard is that some of my birds would rather sit in the trees than fly. If you let this happen you will have real problems later on. I make note of the birds that like to do this and when I release the birds these get a good toss, If they still land in the trees or on the house roof I will throw balls or frisbees at them. Some fanciers use a flag and this is known as flagging. This is a last resort and I certainly do not want to scare birds that are behaving. Whenever I throw things at them I clap my hands as I want them to understand that clapping hands means FLY. If you are consistent most birds will straighten up If they don’t you will want to separate them from the rest of the kit as the other birds will pick up these bad habits. Problem birds can be trained together and you may get them to behave later, just don’t let them ruin your kit in the meantime. I give problem birds a few weeks and If they don’t straighten up by then they will not be used in a kit. When your birds have all landed call them in and feed them. I like to go through this procedure twice a day.
Flying Your Kit
After a week or two your birds should be starting to kit and should be flying for several minutes to half an hour or so. At this time you can introduce a couple of older birds to the kit. I like to fly the older birds first and when they start to slow down release the youngsters. Your old birds should like to fly fairly slow and stay close to home. If you can, fly your kit twice a day in fairly nice weather, and in a month or so they should be kitting well and starting to roll. My family of birds start rolling around two months old, and are spinning well at four months. I’ve read of families that take over a year to develop into spinners. It is important to know your family of birds so that you know what to expect from them.
Feeding For Performance
Proper feeding is very important for top performance. Your birds will kit and roll better when hungry. When your birds are mature you should cut back their food and only feed once a day. Some fanciers will even give separate measured rations to each bird, adjusting the quantity according to the way the bird flew. I just measure feed in a coffee can. Figure out how much feed your birds will quickly eat at one feeding, and adjust from there. If the birds fly too long and are seldom rolling I will cut the rations for the whole kit. If the birds don’t fly for at least 45 minutes, I will give them a little more food. Each family requires a different amount of food to be at peak performance and if you fly several different families together adjusting feed will be difficult. Feed requirements will also vary depending on the weather and several other factors. Your birds may also perform better with different mixes of grain. Most fanciers cut back on protein, and some will feed only wheat or milo before a competition. I feed a pigeon mix with 10% protein. In the winter I add popcorn to the mixture. Click
Birds Behaving Badly
No matter how well you train, or how good your stock is you will have some individuals that just don’t get with the program. One of the major problems will be birds that don’t stay with the kit (outbirds). Outbirds may perform well but if they won’t kit you will have to get rid of them or they will ruin your whole kit. Birds that like to land early or just don’t seem to like to fly will also have to go. Some very deep birds will have trouble catching up with the kit after they have rolled, but if they are always trying to kit I will usually keep them. Some birds will roll loose and sloppy, I will keep them only if I need more birds to fill in. Some birds will not have much depth or may not roll very often. You can fly some of these birds so long as they are not affecting the rest of the kit. One problem bird that I should mention is the roll down (no airbrakes) these birds will usually cull themselves and save you the trouble. Some birds are not quite roll downs but will sometimes bump when taking off, or may hit a tree now and then. You can hand toss these birds and fly them often and sometimes they will grow out of it. I will sometimes fly problem birds, but they will never make it to the breeding loft. If you want to get the most enjoyment from your kit get rid of all of these problem birds, or at least fly them separately from the main kit. Last year I separated out my best and flew a kit of only 6 birds. These birds kit tightly, spin together regularly, and really put on a show. I get more satisfaction out of this type of performance than a large kit of mediocre rollers.
Competition Flying
Here we get into a subject in which I have very little experience. The only kit that I ever flew in competition was in 1973 when I was a sophomore in high school. These birds were of unknown and certainly mixed families, I didn’t even know what a strain was back then. My birds flew well (as far as I know) but I have no idea how they scored. The judge just told me that I had some good birds, and that was fine with me. I just enjoyed letting other pigeon guys see my birds, and the kit made me proud. Since then our local roller club is exclusively a show bird club, perhaps I can generate enough interest to get some flyers involved. Rollers are usually scored for a 20-minute fly. The kit typically consists of 20 birds. A roller kit is judged on the quality, frequency, and depth of the birds. There are a few different sets of rules, but basically when several birds roll together, they are counted and scored as a turn. The turns are added up and multipliers are figured for quality and depth. Out-birds that don’t stay with the kit can stop the scoring, and early droppers or roll downs can cause disqualifications. If you want to know more about competition I recommend that you join The National Birmingham Roller Club and subscribe to the Roller Journal.
In Conclusion
Rollers are basically easy to keep and train, and I think that if you follow the suggestions outlined here you will get much enjoyment from your kit. One thing that needs to be mentioned is consistency; your birds must know what you expect from them. If you follow the same routine every day they will be much more predictable. It is best to fly them in the morning, as the winds are usually lighter. Feed them right after they trap and you will have less loafing. If you have any questions or suggestions, please E-mail me. I will add to or edit this article so as to allow us to get the most out of it. Now all you have to do is get out the chaise lounge, open a beer, light a cigar, lay back and…